Release a document (step by step)
A document can only be released after it was successfully approved. The general release settings are set here under "Configuration". They offer options on notification, comment, electronic signature and expiration of document validation.
Release process
Click "Document Status" dropdown to open status selection:
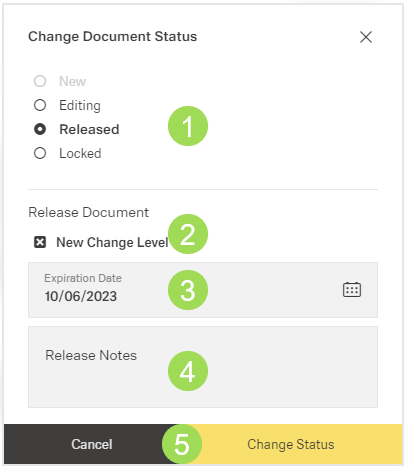
The illustration shows the window for document release: (1) select status, (2) set "new change level", (3) set expiration date, (4) edit field for release notes, (5) buttons
Select "Released"
Activate or deactivate "New Chenge Level"
Default setting is "activated"
The activated "New Change Level" means that the version number in document information is updated to the next number, e.g. from "2" to "3" (green frame in the screenshot). Depending on the company regulations, it's is possible that updating the version number is not necessary for the release after a minor change (e.g. correcting a typing error in a document).
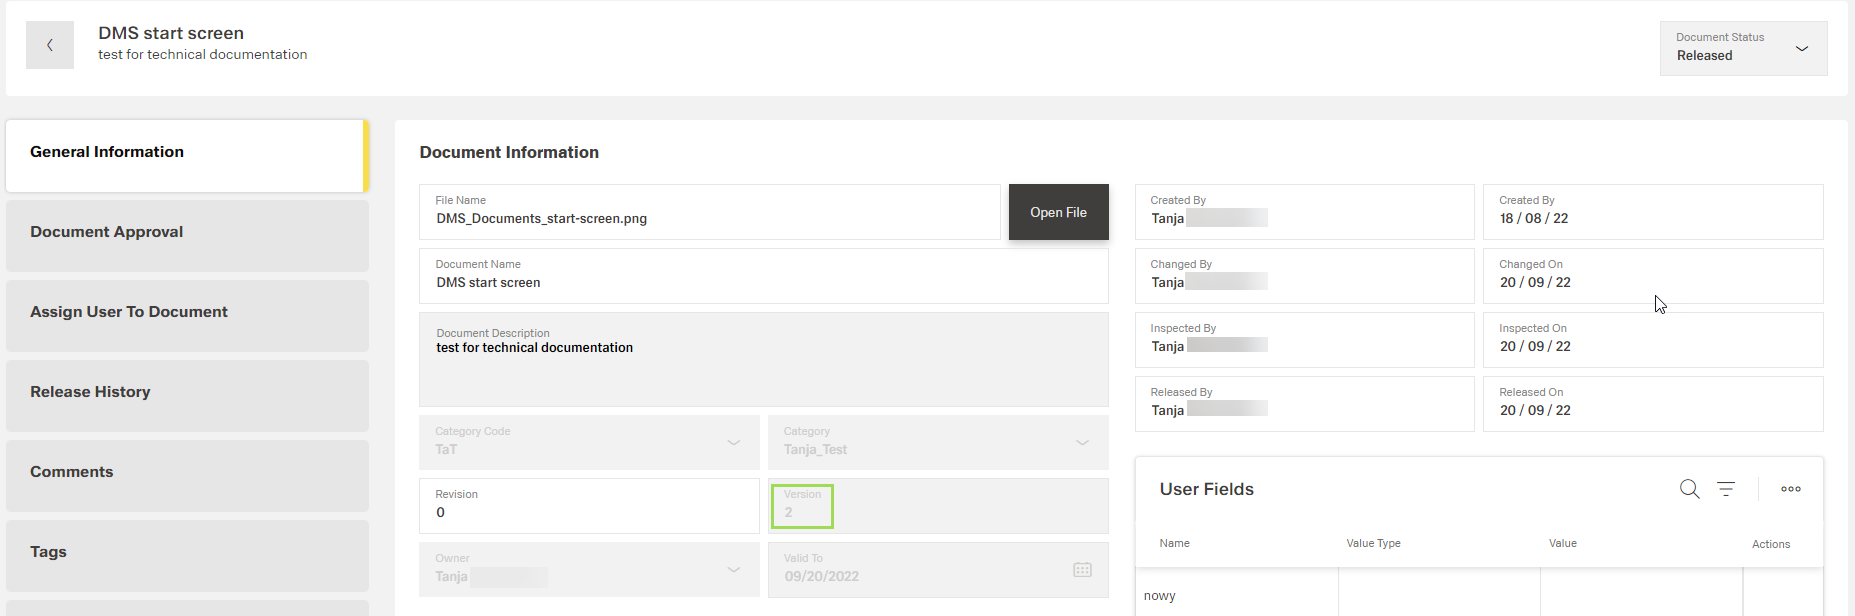
The illustration shows the document information after the release
Check "Expiration Date" and change it if needed by clicking on the calendar button [![]() ] <3> to select the correct date
] <3> to select the correct date
When clicking the calendar button, the following window appears:
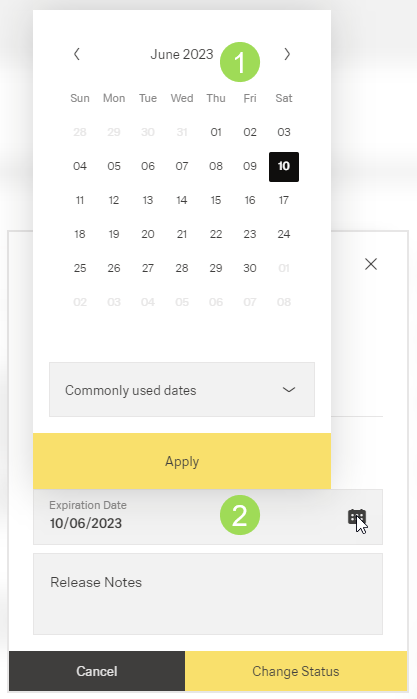
Select a certain date <1> or select one of the commonly used dates <2>:

Click the button Apply
Add "Release Notes" if needed
Information on comment is given here.
The release note is shown in "View Release History" of the selected document and in the DMS end user portal.
Click the button Change Status (or Cancel)
If the electronic signature is deactivated: A message about the successful action appears at the top of the screen.
If electronic signature is activated under Approval and Release Settings for this document, the following window appears:
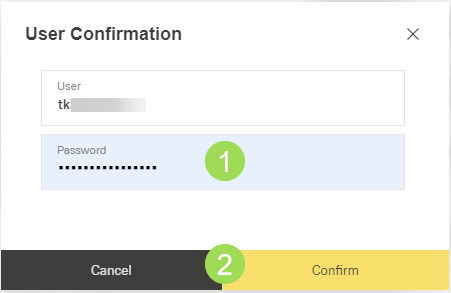
Enter login password <1>
Click the button Confirm <2> (or Cancel)
A message about the successful action appears at the top of the screen.
Information on the document status can be found here.